In part 1 I implemented a CHIP-8 in Swift. In this part I will describe the process of adding a debugger.
The code can be found on Github in repo [1].
Motivation
Writing an emulator with only print statements to aid me in spotting my mistakes was tedious and error-prone. The logs would have to be combed meticulously and compared with the code in the ROM (which had to be decoded by hand) to work out where the mistakes were.
A debugger would allow me to look at the values in memory in the GUI, and step through the program opcode by opcode.
Design issues
Before building the debugger UI, there were a couple of design issues in the code that needed to be addressed:
- Almost all the code was inside the default ViewController class, hindering multiple views backed by the emulator state.
- Everything except rendering the display was done in a background thread. If I wanted to display the emulator state, any updates to the state would need to be done on the main thread.
The first step was to fix these issues.
Breaking down the code
In the initial design every CHIP-8 memory array was stored directly in the ViewController:
var ram = [UInt8]()
var V = [UInt8]()
var I: UInt16 = 0
var delay: UInt8 = 0
var sound: UInt8 = 0
var PC: UInt16 = 0
var SP: Int8 = 0
var stack = [UInt16]()
These were accompanied by the implementation of every single opcode.
The new design looks like this:

The ViewController now has responsibility more in accordance with its status. It powers the user interface, and kicks off the emulator when required. The CPU is responsible for actually running the instructions, and modifying the various regions of memory accordingly, which are now segregated into classes.
Threading
Swift on macOS benefits from Grand Central Dispatch, which means that resolving the threading issue is relatively straightforward: identify areas which cause UI changes, and make sure they are dispatched to the main thread.
DispatchQueue.main.sync {
    registers[index] = ByteCell(index, newElm)
}
Showing the contents of registers
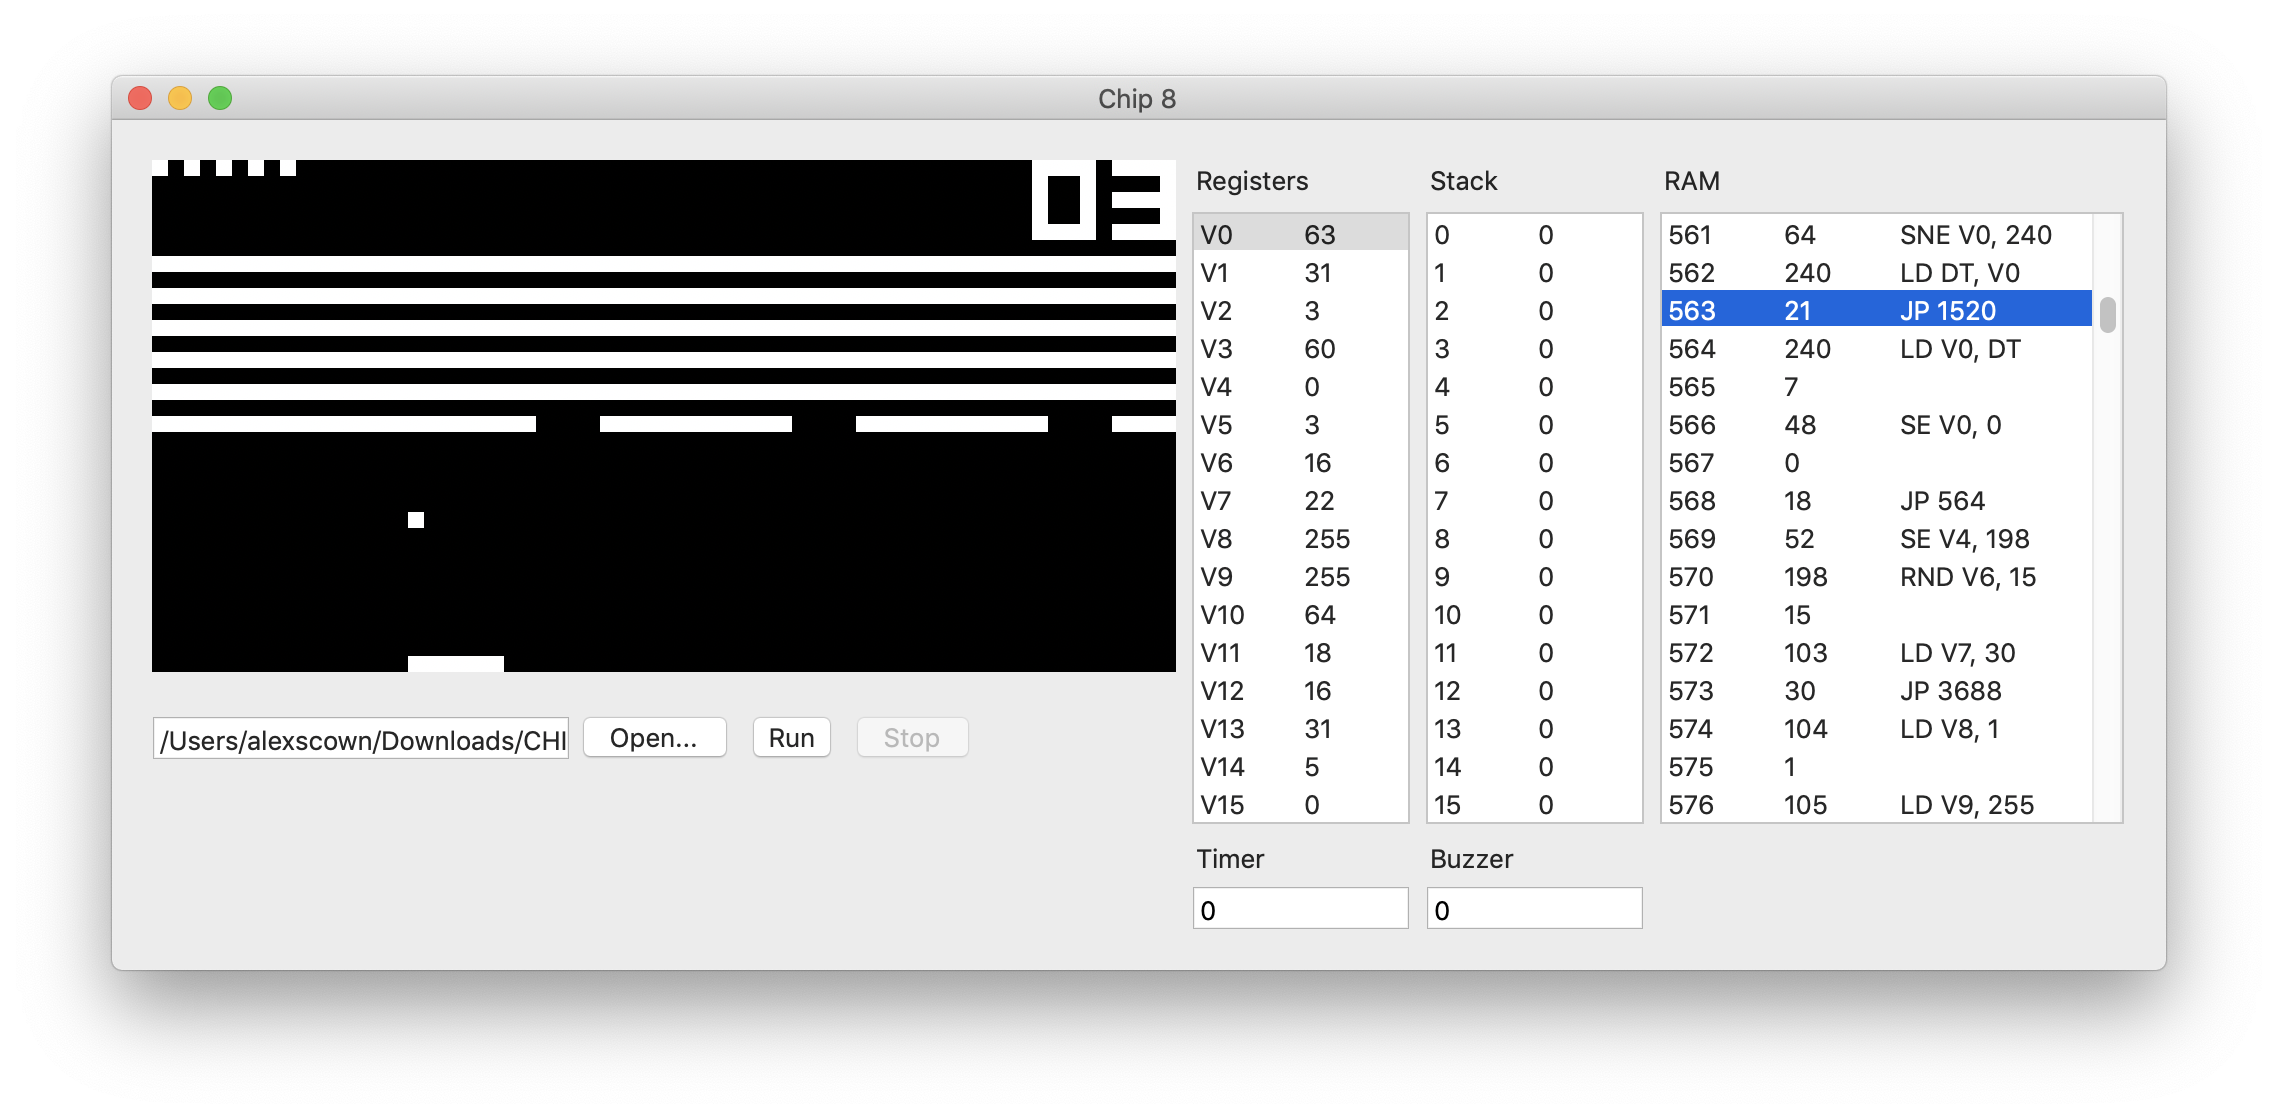
To show the contents of the registers I needed a table view with two columns: a register label and the contents of the register itself. The table view would be backed by an ArrayController which would bridge between the registers array and the table.
At this point I hit a couple of snags:
UInt8is not a subclass ofNSObject, and so can’t be the source of anArrayControllerbinding.- A
UInt8array provides no binding for the array index.
The solution to both these problems was to create ByteCell, a trivial sublass of NSObject containing a register index and the value of the register. An array of ByteCells would then be wrapped in a class which would allow the rest of the application to ignore this implementational detail.
I then bound the ArrayController to the array of ByteCells and the table view to the ArrayController, running the index through an NSFormatter to get a more sensible label.
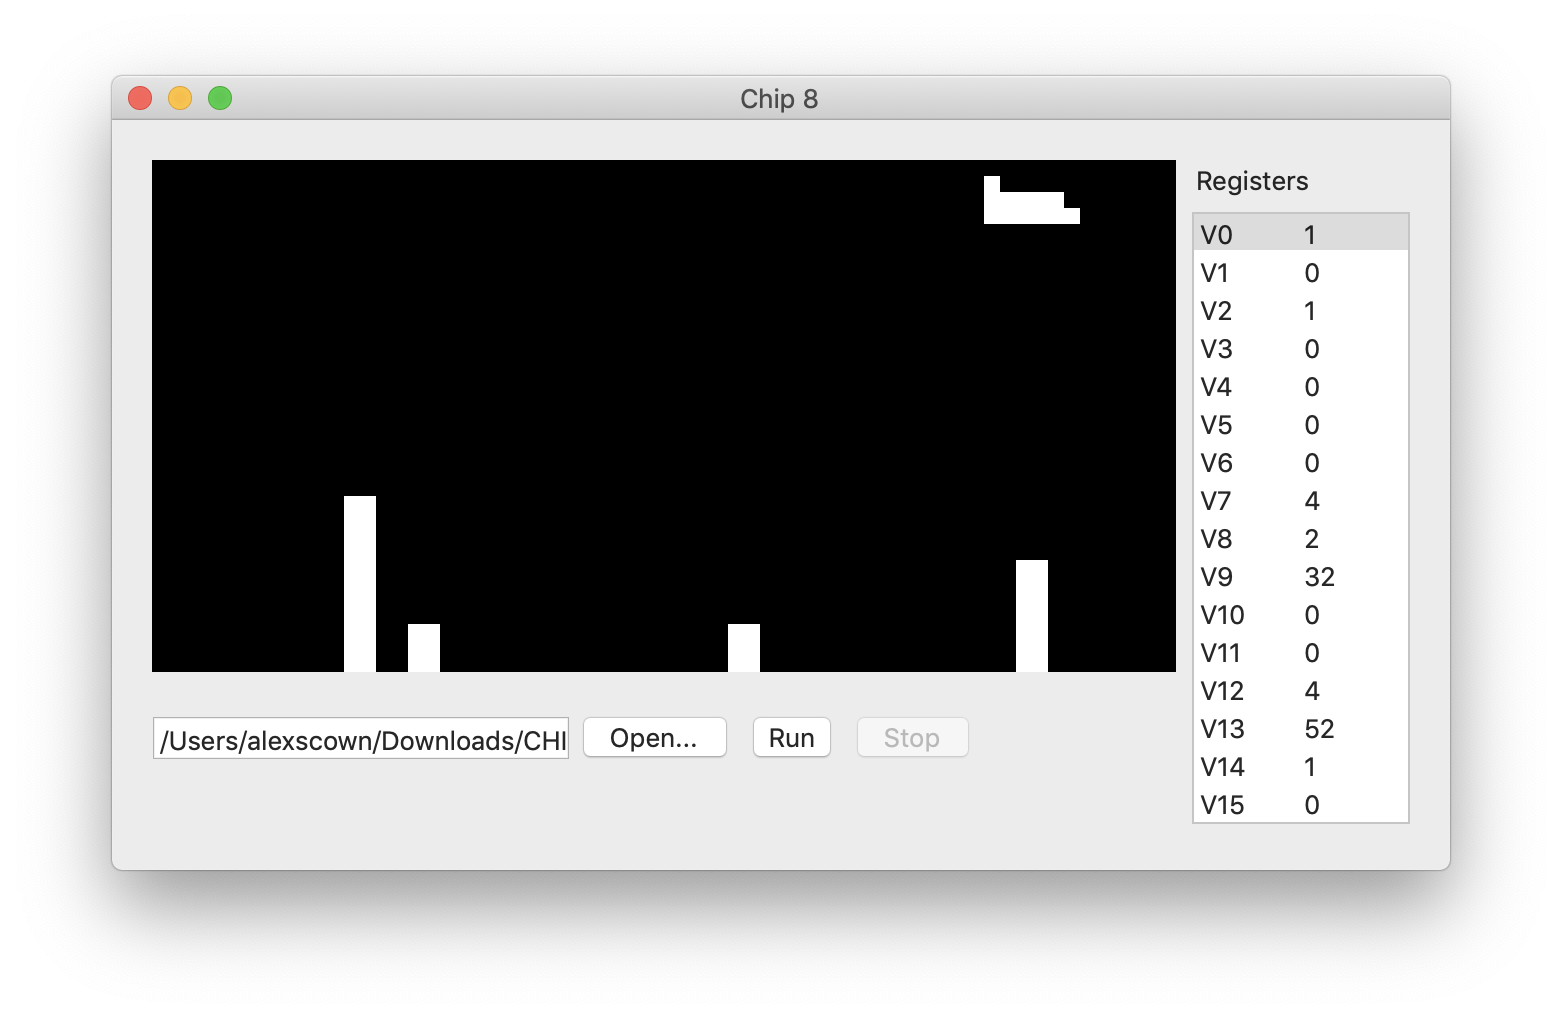
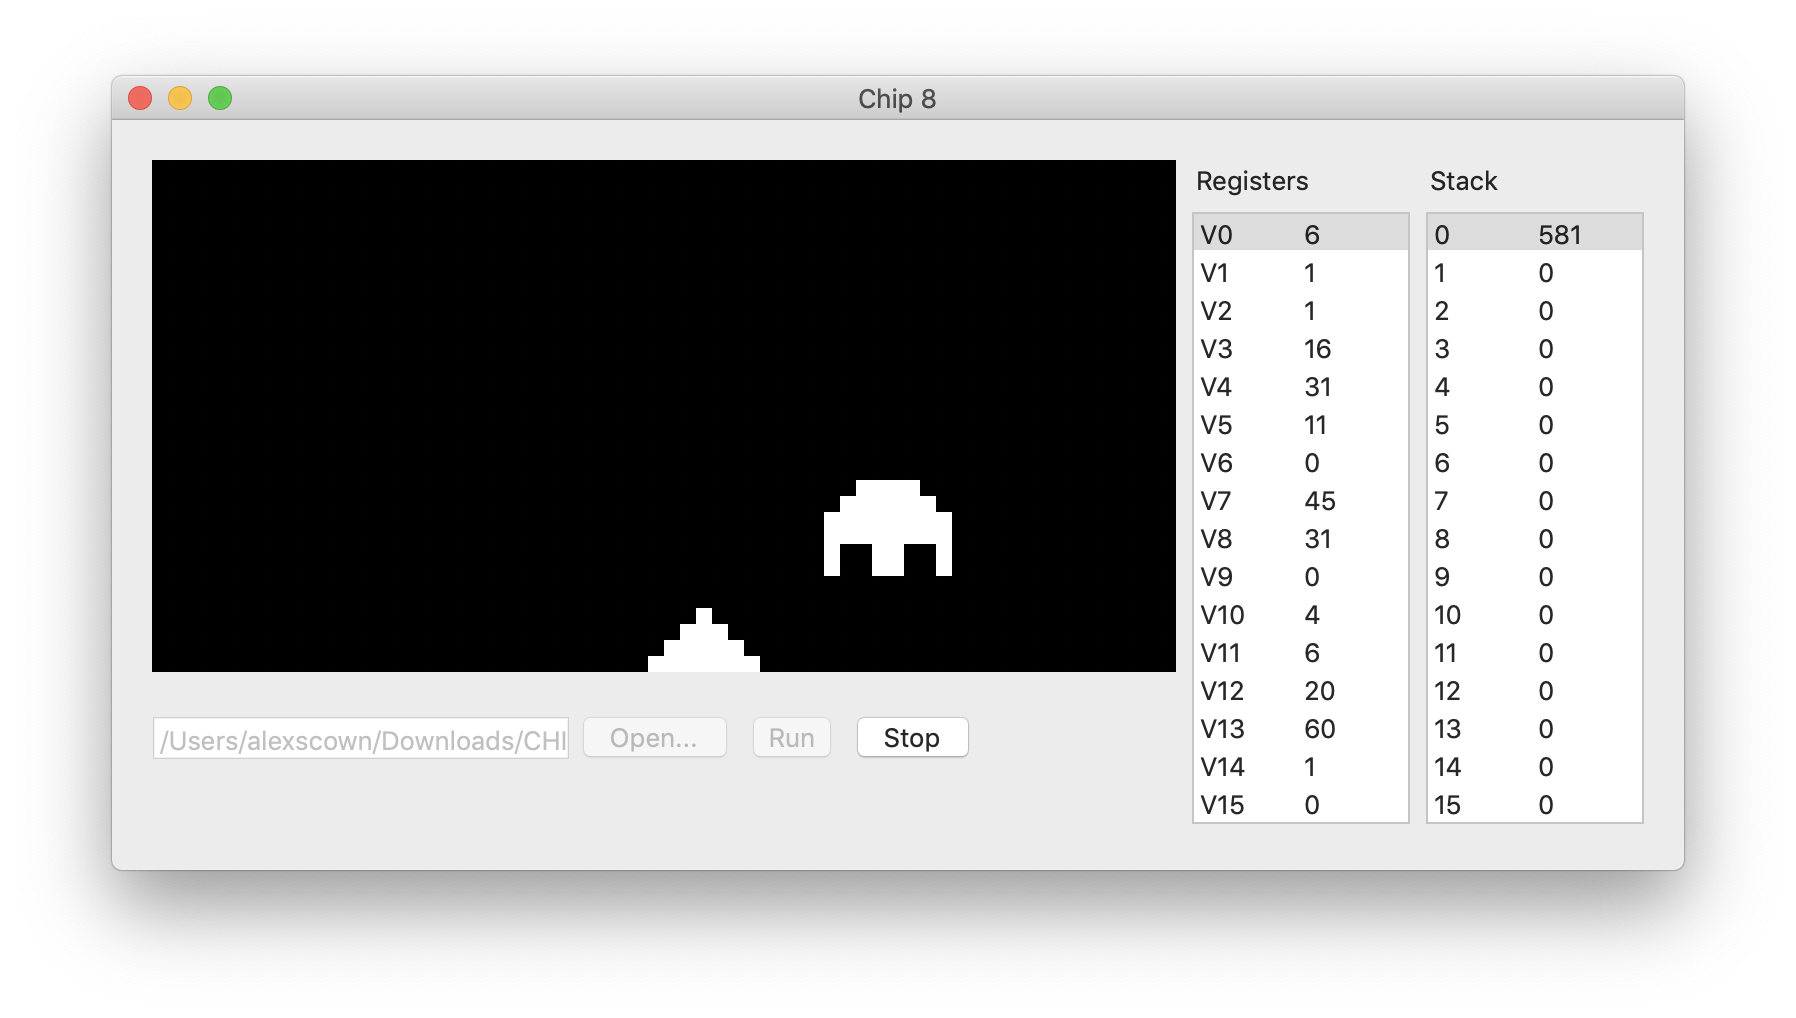
Showing the contents of the stack
Showing the stack is basically the same as showing the registers (albeit with UInt16s rather than UInt8s). The main difference is that it would be nice to highlight the value that is currently at the top of the stack.
Selection is achieved by binding the selectionIndexes property of a TableView to an IndexSet, and adding and removing the value of the SP register as it changes. An IndexSet can contain multiple items, but this isn’t a feature that I require here.
Optimisation
At this point it was becoming apparent that the debugger was a drag on the performance of the rest of the emulator. It was time to break out the profiler and identify areas to optimise.
The macOS Developer Tools include Instruments for this purpose.
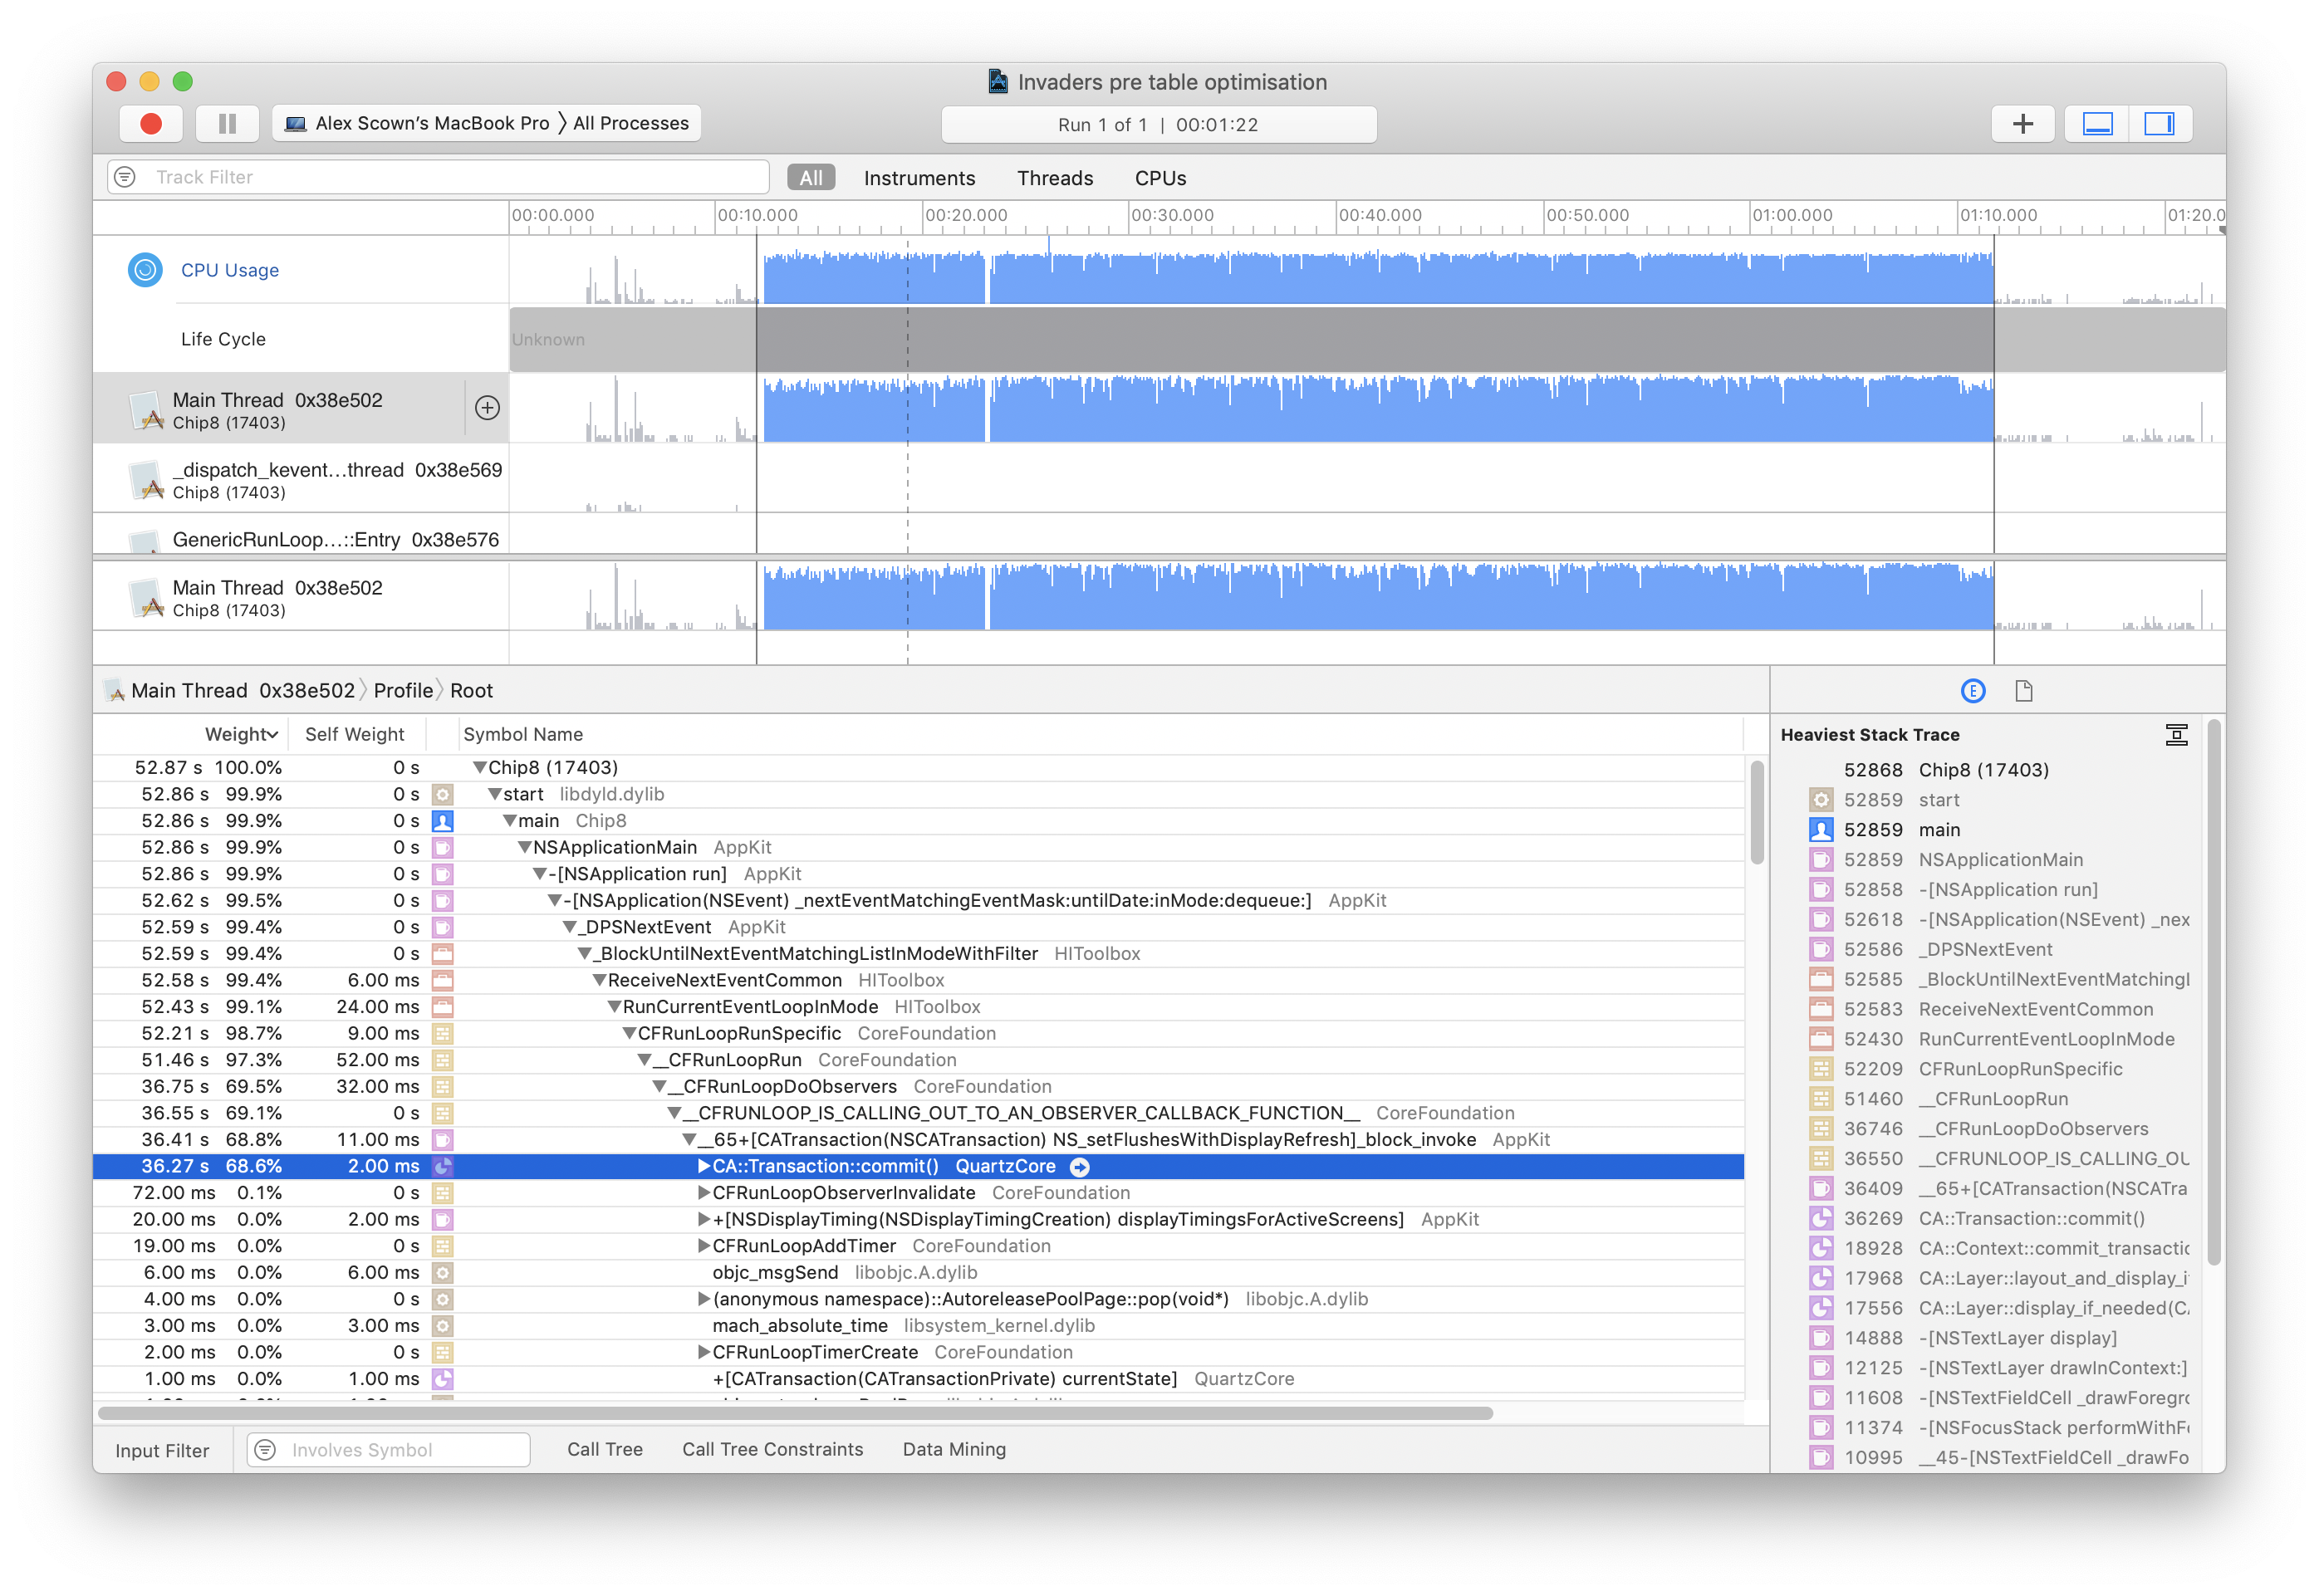
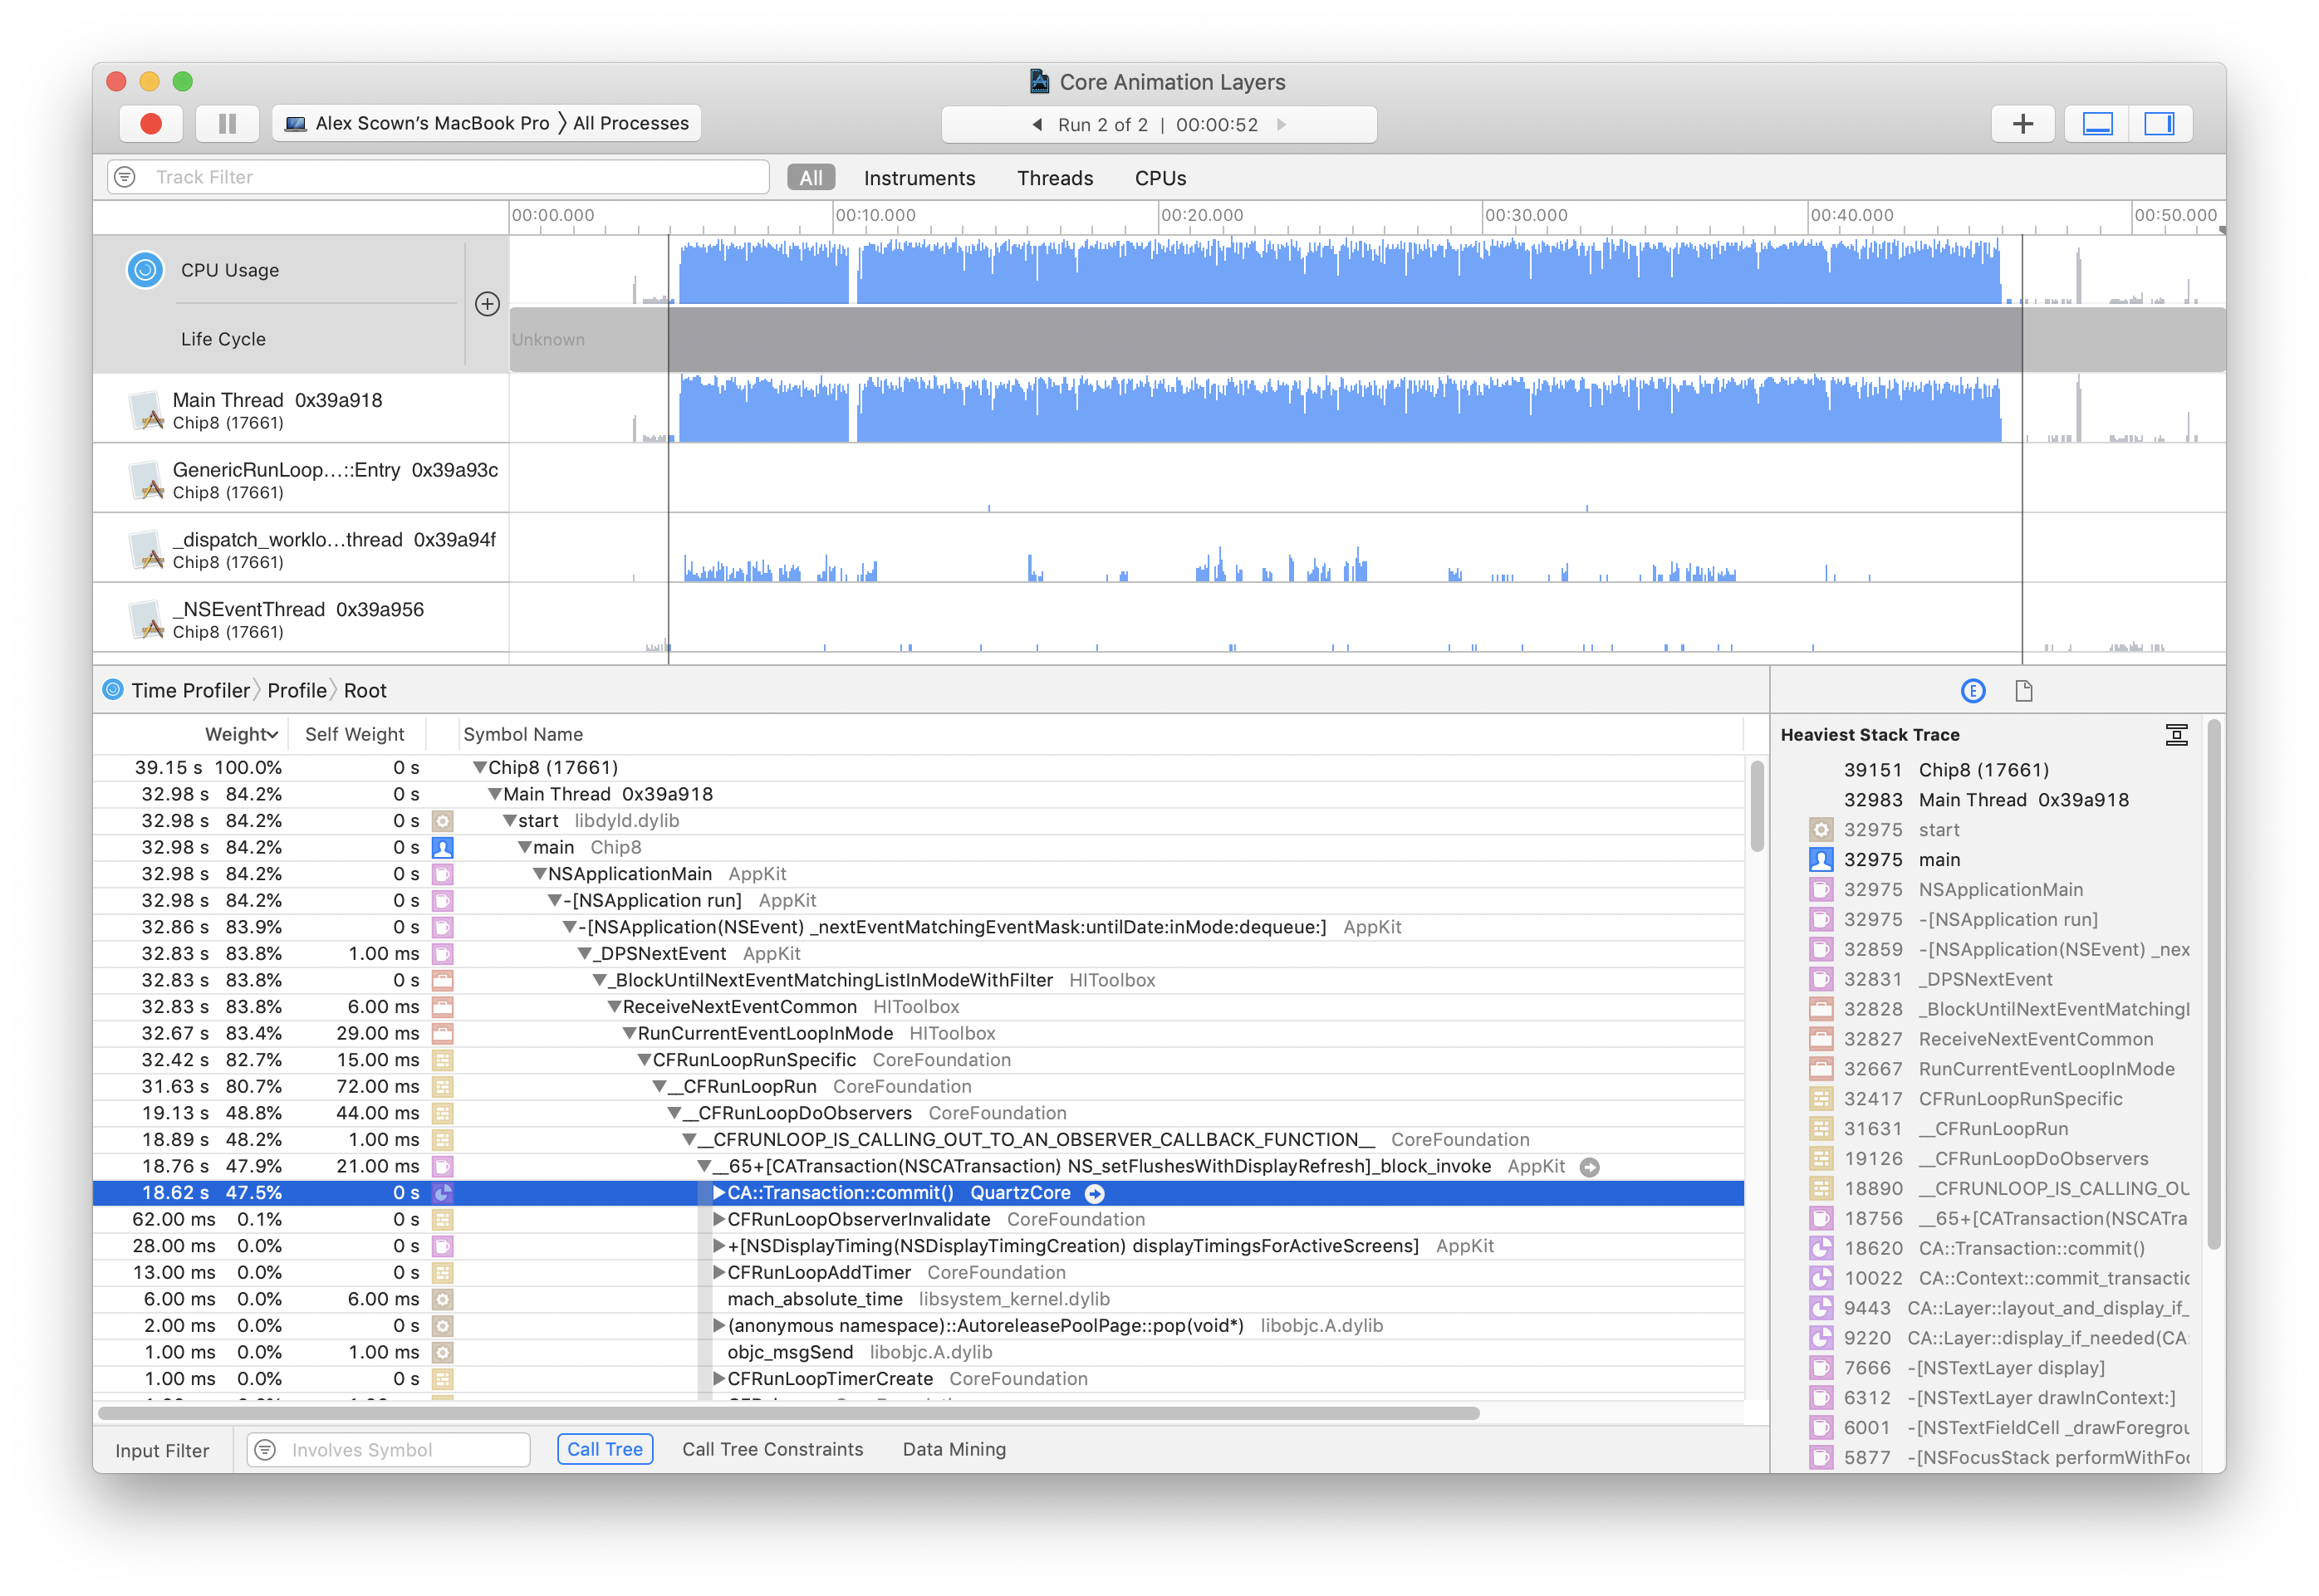
By running Swift8 through Instruments and recording the CPU times, it becomes clear that the biggest chunk of time is spent inside Core Animation transactions. Performance here can be improved by creating a separate Core Animation layer for any UI component which is redrawn frequently.
Running the profiler again with these changes shows an approximately 50% speedup in this area, giving improved emulator performance.
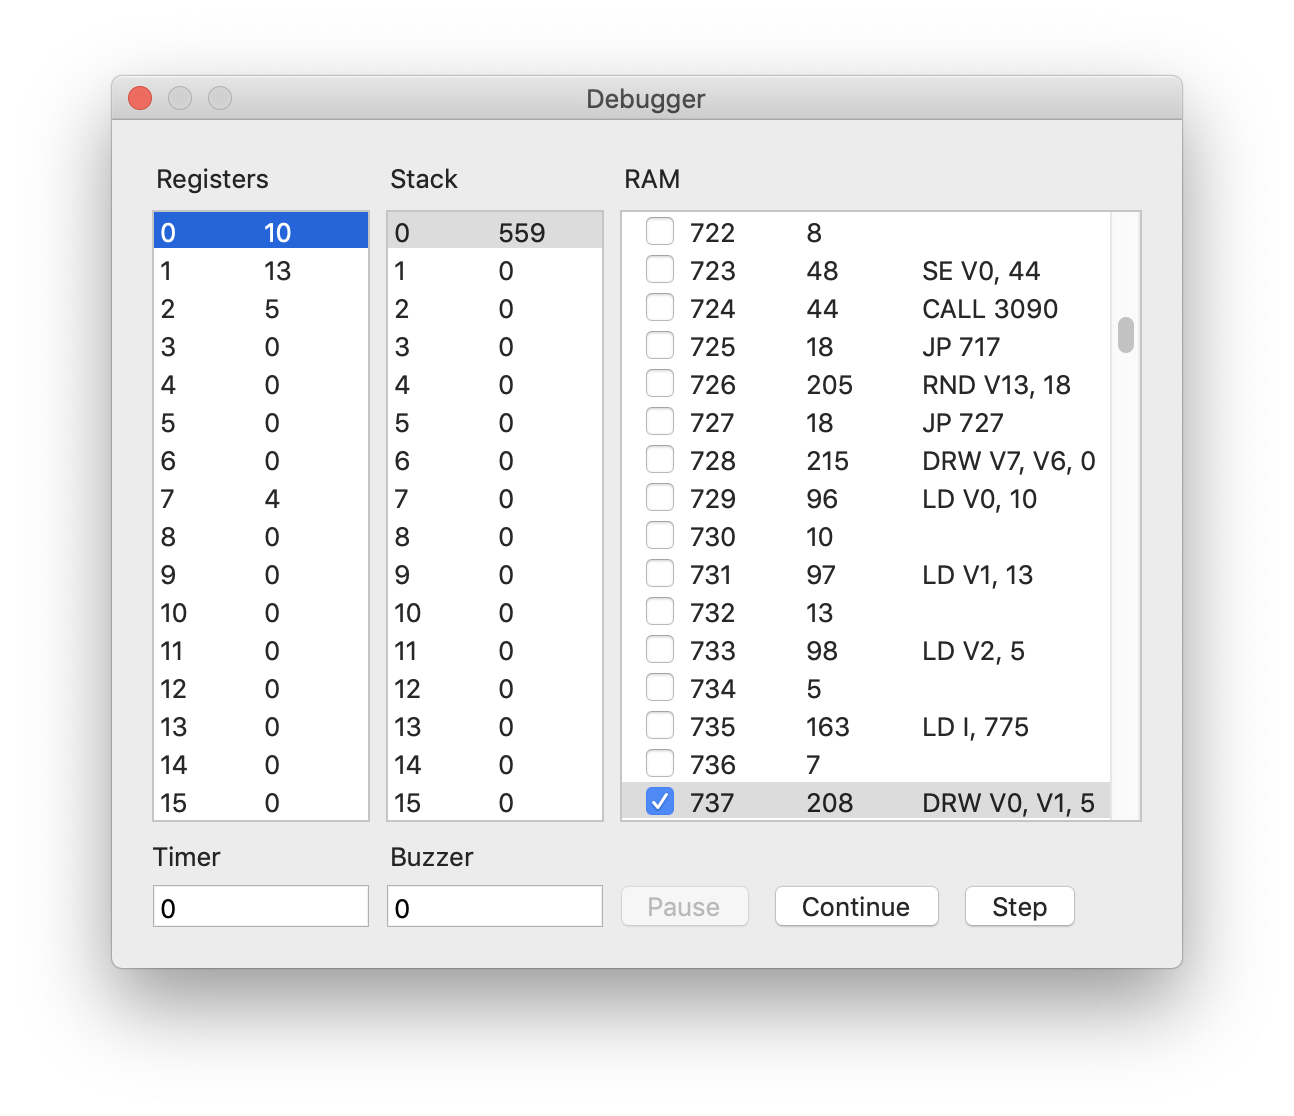
Showing RAM
RAM is similar to the registers, but is obviously much larger. As such, it can be represented as an array of ByteCells.
However, the RAM stores the code of the currently executing program as well as its data. It would be nice to display any cells containing instructions in their disassembled form for easier debugging. It’s also useful to keep the current instruction in view as the code is executed, which was not an issue for the Stack.
Some cells may contain values which do not correspond to an opcode, in which case no sensible value can be displayed. Other byte pairs may look like instructions, but will never actually be executed. Given that CHIP-8 code may jump arbitrarily, it is not possible to identify these codes up front.
Representing instructions
Given that there is no segregation of code and data, any RAM update may potentially be modifying code, and requires the instructions in the corresponding cells to be updated.
CHIP-8 instructions are two bytes long. This means that any single RAM write requires us to compute two instructions:
- The instruction starting at the current address
- The instruction starting at the previous addressed
If multiple sequential writes are preformed, I can optimise this by only updating the previous instruction until I get to end of the modified address range, before finally updating the last instruction.
This requires a new structure, similar to a ByteCell but capable of storing an instruction string. However, if I’m going to decode instructions as they are written to RAM, it makes sense to cache this and reuse it when the instruction comes to be executed. Therefore I need to store a mapping from the instruction to the corresponding CPU function.
Putting this together, I wind up with the following:
@objc protocol Instruction {
    var mnemonic: String { get }
    var advance: Bool { get }
    var pause: Bool { get }
    func execute(onCpu: Cpu)
}

class RamCell: NSObject {
    @objc dynamic let address: Int
    @objc dynamic let byte: UInt8
    @objc dynamic let instruction: Instruction

    init(_ address: Int, _ byte: UInt8, _ instruction: Instruction) {
        self.address = address
        self.byte = byte
        self.instruction = instruction
        super.init()
    }
}
I then need an Instruction implementation for every instruction, whose mnemonic is the display string and whose execute method calls the correct method on the CPU.
This changes the CPU’s run loop to simply reading the next instruction from RAM and calling the execute method, passing itself as the onCpu parameter.
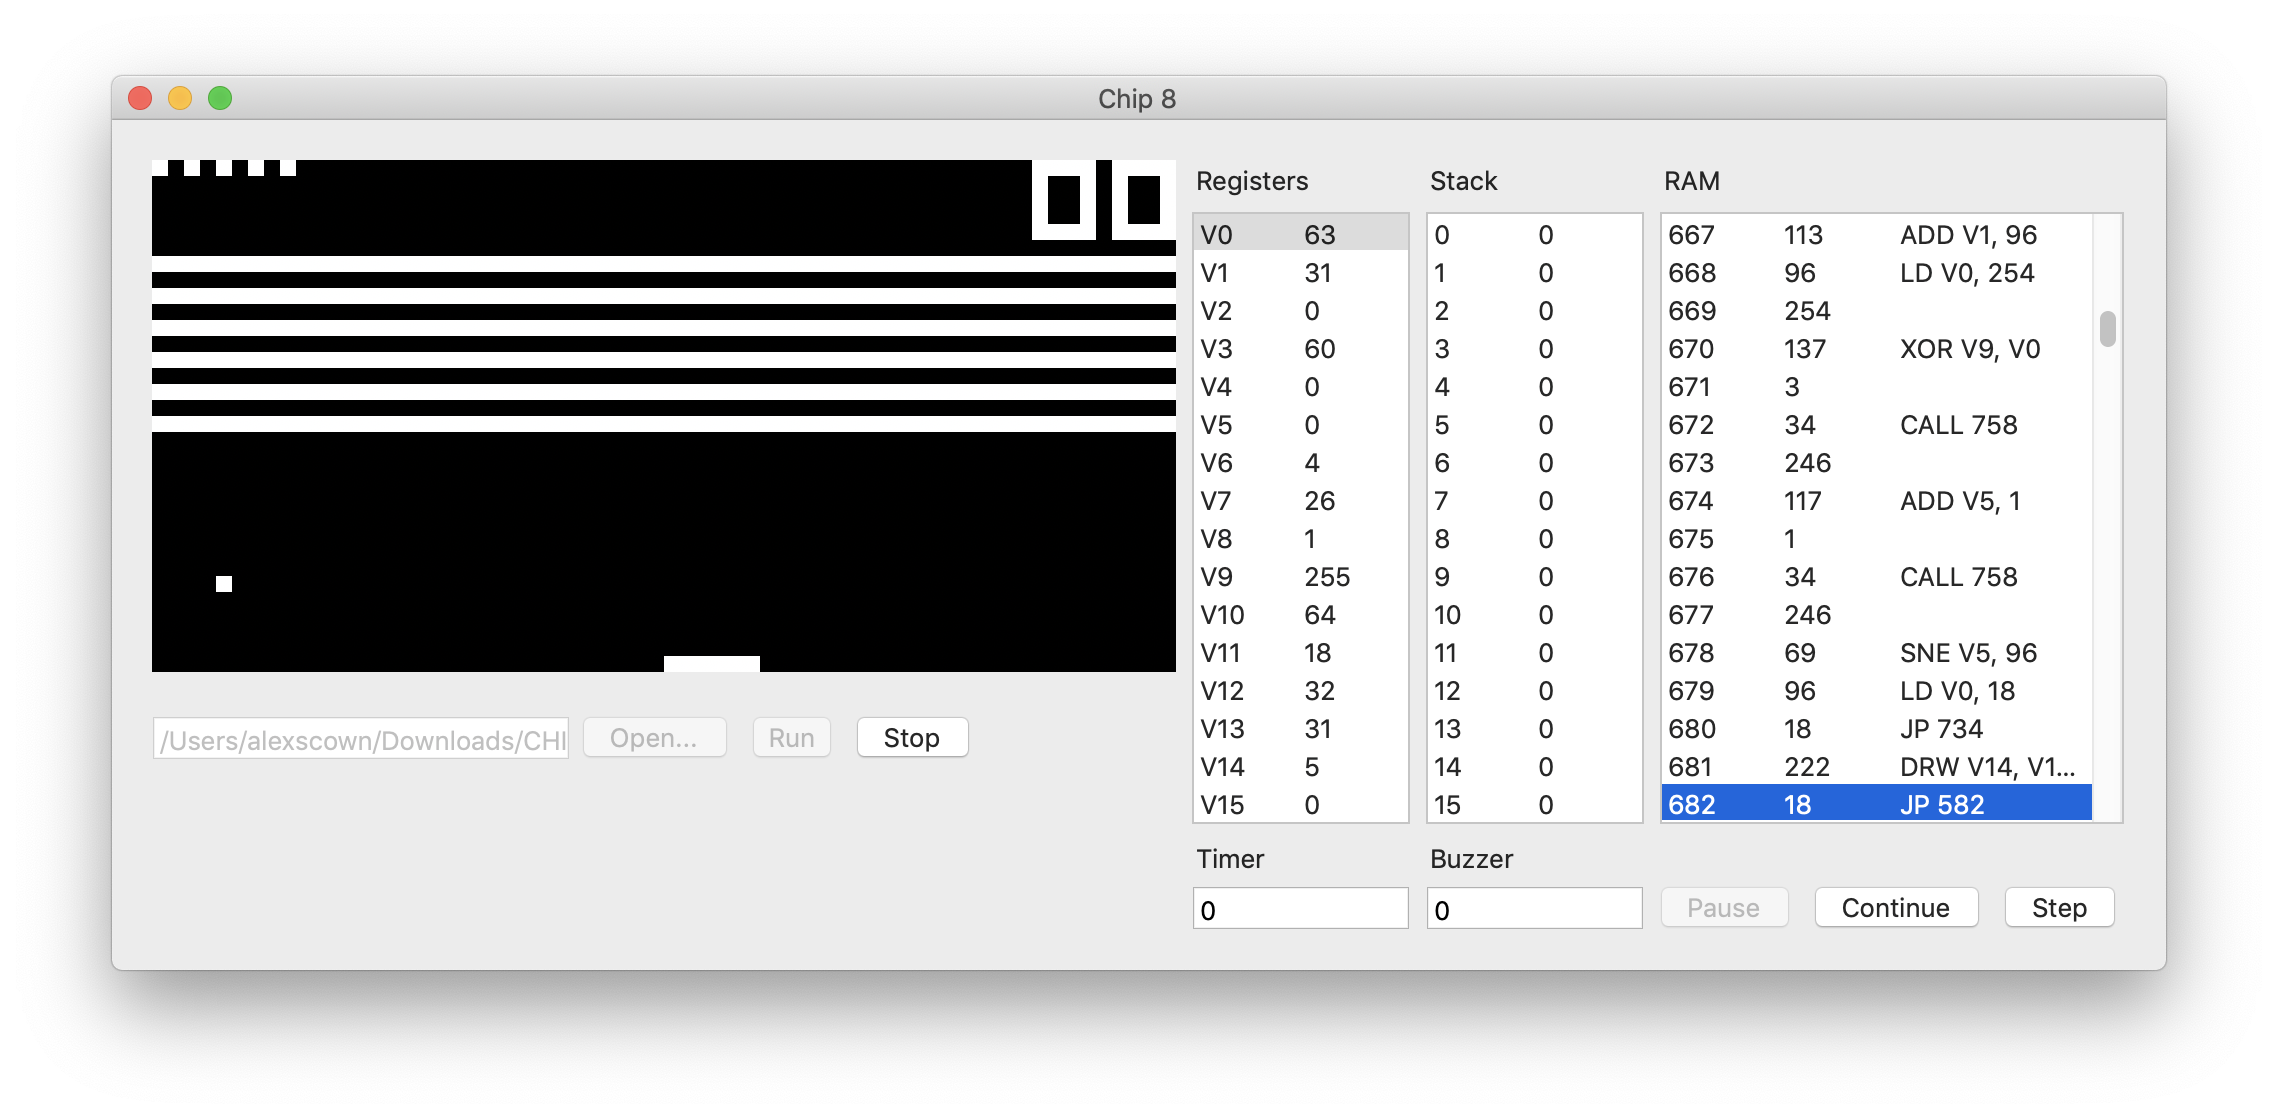
Pause, Continue and Step
Any good debugger allows the ability to pause code at arbitrary points. I can implement this with a flag which when set prevents execution of the next instruction. I then need three new UI controls:
- Pause
- Set the pause flag
- Continue
- Clear the pause flag, and execute the next instruction
- Step
- Execute the next instruction, but do not clear the pause flag
It should only be possible to pause the emulator if the program is running, and it should only be possible to step and continue if the program is paused.
By adding some synthetic properties to the view controller based on the flags, this is straightforward to implement.
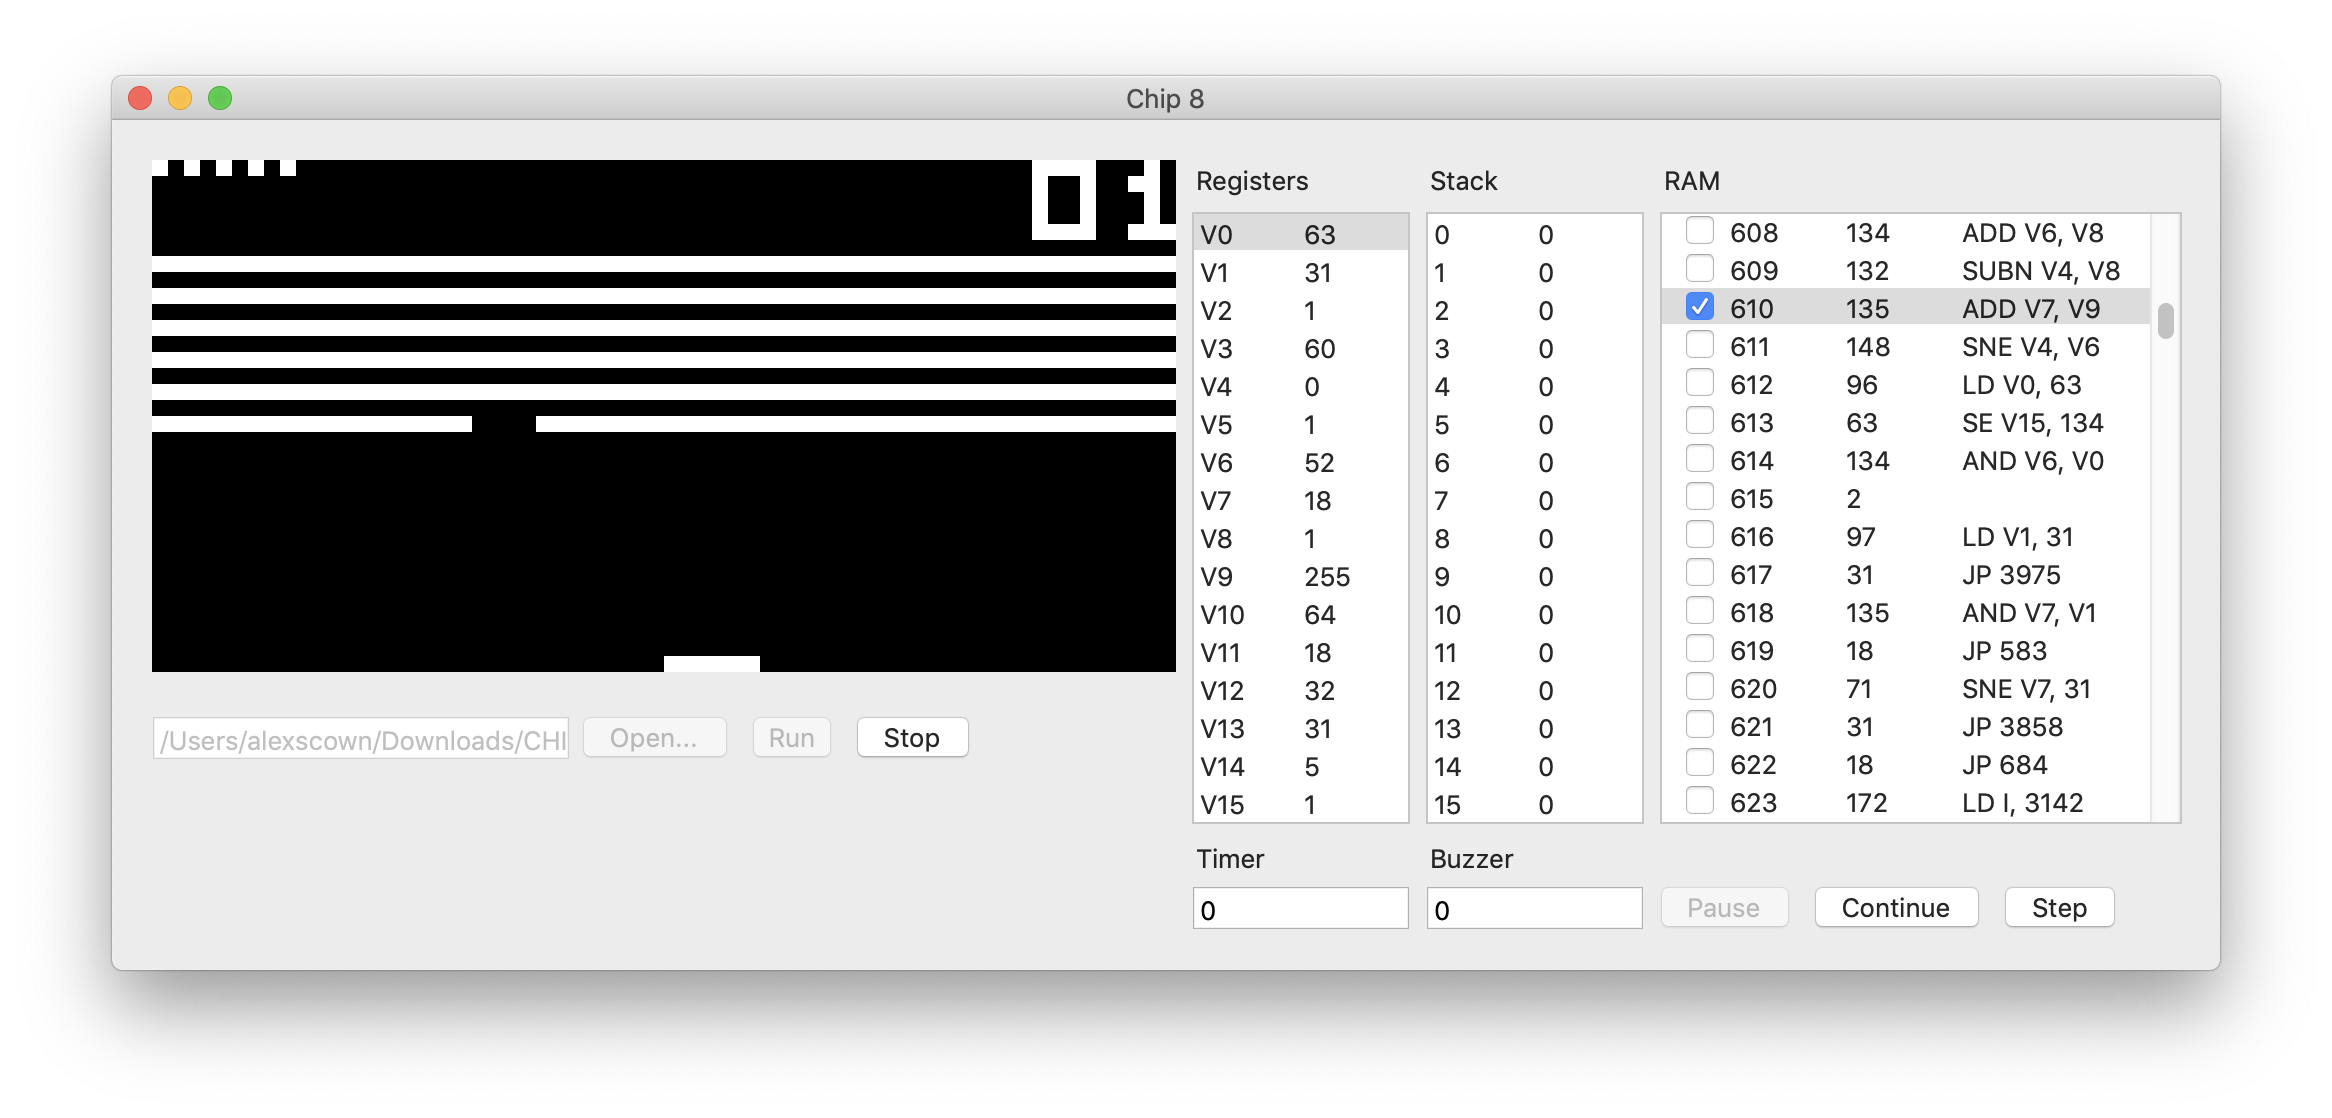
Breakpoints
A logical extension of the pause and resume functionality is the ability to set breakpoints - being able to determine ahead of time where to pause without needing cat-like reflexes to pause at the correct point.
This can be implemented by adding a checkbox column to the RAM table in the UI, and adding a boolean breakpoint property to each instruction which binds to the value of the checkbox.
All we need to do then is to check the value of the instructions breakpoint property before it is executed, and setting the pause flag as necessary. The step and continue buttons can then be used to navigate, and it all just works.
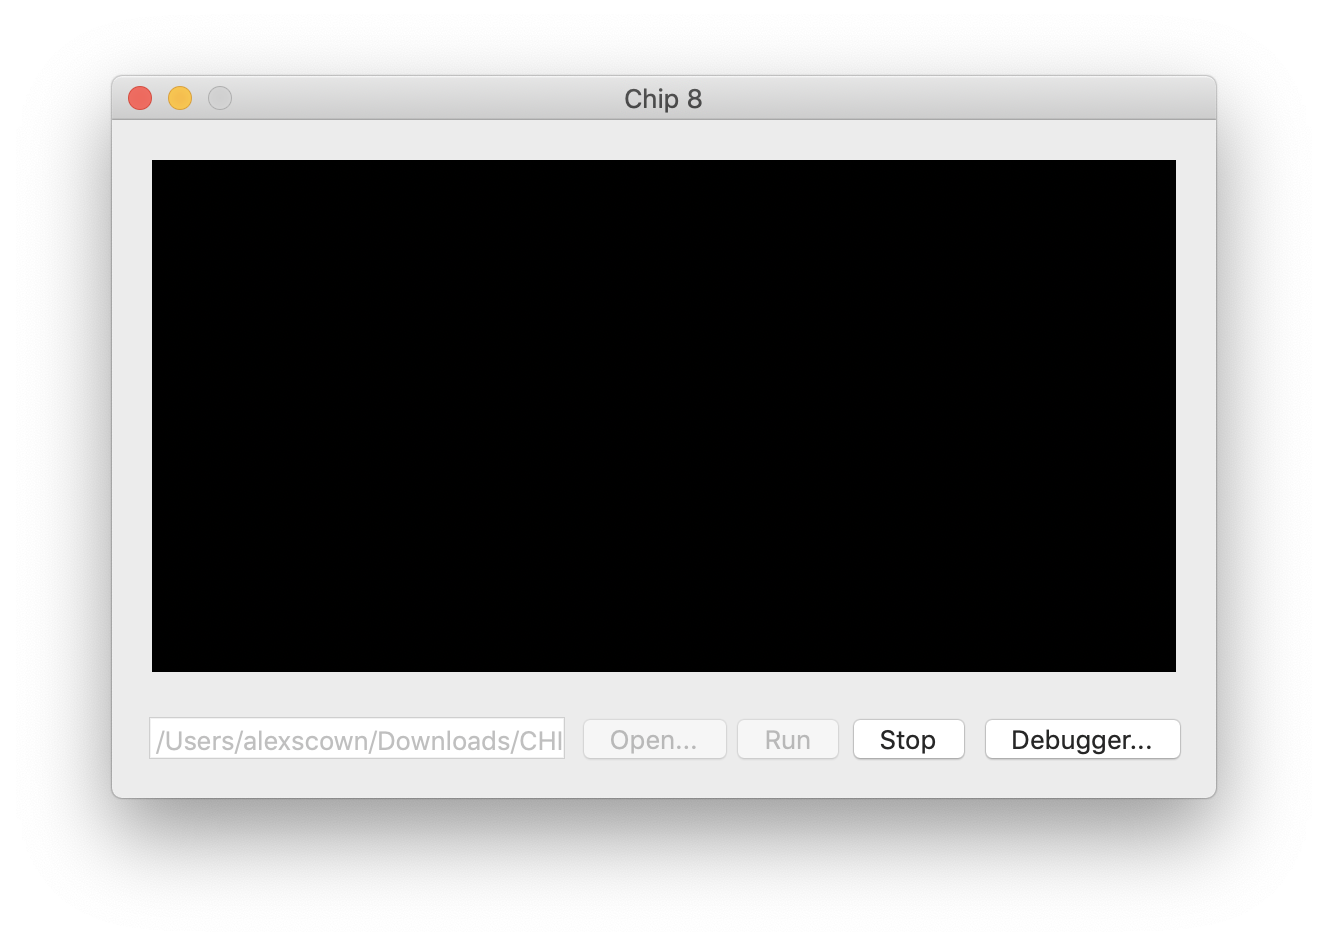
Removing the performance overhead
Despite the optimisations made above, the debugger still acts as a drag on performance. Even if the debugger remains unused, the views still get rendered and all that scrolling doesn’t come cheap.
The solution to this is to offload the debugger to a separate window, which can be opened or closed as desired.
This requires the creation of a separate view controller, which handles the debugger related functionality, and rearranging the Storyboard accordingly.
Conclusion
At this point the debugger – and the emulator itself – are now complete. This provides a good foundation for the construction of a more sophisticated emulator.